This entry is part 6 of 9 in the User Submitted Image Galleries Series
- User Submitting Gallery Images – Part 1
- User Submitted Gallery Images – Part 2
- User Submitted Image Gallery – Part 3
- User Submitted Image Gallery – Part 4
- User Submitted Image Gallery – Part 5
- User Submitted Image Gallery – Part 6
- User Submitted Image Gallery – Part 7
- User Submitted Image Gallery – Part 8
- User Submitted Image Gallery – Final Overview
Part 6 of User Submitted Image Galleries will show you how to setup the single image page that shows the details for a particular image. This section is not very complex, but it covers a few very important techniques that are really good to know when it comes to modifying information on post templates via a plugin, when you do not have direct access to the template files themselves.
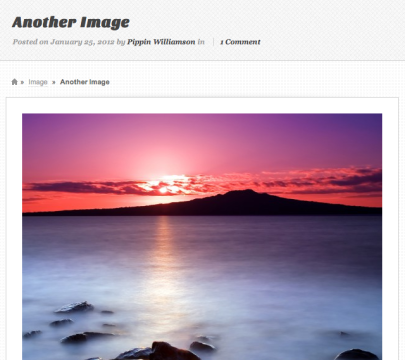
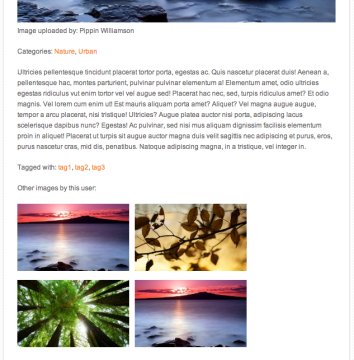
Once we are done with the steps in this part of the series, we will have the functionality shown below in the screenshots:
Our main image gallery is outputted via a short code on any regular WordPress page that the user of the plugins wants. When clicking on an image in the gallery, however, WordPress redirects the user to what is called the “single” page for the image. This page is usually rendered with the single.php file, or, the single-{post-type-name}.php file, if it exists. This means that the gallery short code is no longer used, but instead the image is rendered by the template file, which means that whatever the active theme has placed in that file is what is going to get shown. This means that we, as plugin developers, do not have a lot of control over how it shows up, and this becomes rather tricky when we are trying to write a plugin such as User Submitted Image Galleries, because, in an optimum world, we would just modify the single-uig_images.php template to our heart’s desire. But we can’t do that here.
This situation poses a unique challenge for us: we need to figure out a way to display all of our image information, while working within the confines of the current theme. Luckily, it turns out, this is is actually not that hard. Due to WordPress’s tremendous filter system, we can pretty easily modify the output of our images on the single page without ever modifying the template files.
The first thing we want to do is create a new file called template-functions.php and place it in our includes/ folder. Once we have done that, we need to pull the file into our main plugin file, like so:
1 | include(UIG_PLUGIN_DIR . '/includes/template-functions.php'); |
This should be done in the same area as all of our other file includes.
Now, in the template-functions.php file, we are going to write two different functions. These two functions are going to be used to output all of the image details on the single page. This will include the image itself, the categories, the description of the image, the name of the user who uploaded it, the selected tags for the image, and also additional images by the image’s author.
Depending on the theme you are using, the default output of a single image may vary. We want to try and unify the display as much as possible. To do this, we are going to attach all of our image’s information (as listed above) to the image content (description). We can do this by writing a custom function that modifies the post_content field for our images, and then passing it through the filter named the_content.
Our first function looks like this:
1 2 3 4 5 6 7 8 9 10 11 12 13 14 15 16 17 18 | function uig_add_image_to_single_template($content) { global $post; if(is_singular('uig_image')) { // load the necessary CSS -- this is loaded inline and only work with WP 3.3+ wp_enqueue_style('uig-gallery', UIG_PLUGIN_URL . 'includes/css/gallery.css'); $output = get_the_post_thumbnail($post->ID, 'uig-single-image'); $output .= '<p>' . __('Image uploaded by:', 'uig') . ' ' . get_the_author() . '</p>'; $output .= '<p>' . get_the_term_list($post->ID, 'uig_image_category', __('Categories: ', 'uig'), ', ', '' ) . '</p>'; $output .= $content; $output .= '<p>' . get_the_term_list($post->ID, 'uig_image_tag', __('Tagged with: ', 'uig'), ', ', '' ) . '</p>'; $output .= get_other_images_by_author(get_the_author_ID(), $post->ID, 4); $content = $output; } return $content; } add_filter('the_content', 'uig_add_image_to_single_template', 999); |
At the very top, we first check to make sure that we are on the single page for an image. The get_singular() function accepts the name of a post type, and will only return true if on a single page for that post type.
If we are not on a single image, we return the content unmodified.
Once we have confirmed that we are on an image page, we load the gallery CSS. Remember, as of WordPress 3.3, we can enqueue scripts and styes inline like this, but this will not work on earlier versions.
After the CSS is loaded, we setup the HTML that we want to output. The featured image (or just the image’s image) is retrieved using the get_the_post_thumbnail() function. We specify that we want the “uig-single-image” size, which, remember, we setup in the image-sizes.php file.
Next, we use the get_the_author() function to get the name of the user that submitted the image. This will return the Display Name of the user, which defaults to their username if no display name is set.
After the author, we show the categories the image is filed in. This is done using the very handy get_the_term_list() function.
Just after displaying the categories, we want to display the description (main content) of the image. Since we are attaching our function to the the_content filter, the post_content is passed as a parameter to our function, and is named $content. This means that we can just do $output .= $content to display the image’s description.
As we did with the categories, we next use get_the_term_list() again to get the tags of the image.
After the tags, we want to display additional images by the same user. This is done with a custom function, which we will write in a moment.
If you load a single image page now, you should see all of the details. An important thing to remember is that you will need to adjust the pixel width for the uig-single-image image size so that it fits your theme. In the situation where this plugin is released to the world, it would be best to add a setting that allows the user to define the width of the images, without having to modify the code. But we aren’t going to do that now.
Now, something you may notice. If your theme is already calling the get_the_post_thumbnail() function in the single.php template file, then you will have two featured images displayed now. This is because of the function we have just written. In order to prevent this, and to maintain control over the output, we need to somehow remove the image displayed by the theme.
Open the filters.php file for a moment, and place the following function at the bottom:
1 2 3 4 5 6 7 | // removes the post thumbnail HTML from the theme for single images function uig_remove_post_thumbnail_on_single_images($html, $post_id, $post_thumbnail_id, $size, $attr) { if(is_singular('uig_simage')) return ''; return $html; } add_filter('post_thumbnail_html', 'uig_remove_post_thumbnail_on_single_images', 5, 998); |
This function will completely remove the image outputted by the theme (assuming the theme is using core standards and methods) by simply setting the HTML generated by the get_the_post_thumbnail() function to a blank string. We are only doing this if we are on a singular image page.
This will work for most themes, but if your theme is not utilizing some of the core WordPress functions to output the featured images, you might have to come up with an alternate solution, as I had to this morning.
For my demo, I’m using the Swagger theme, which is a phenomenal theme. The above filter, however, did not work while using this theme. As it turns out, Jason (the theme’s author), used a custom set of functions for outputting the HTML of featured images, and the post_thumbnail_html filter was not used at all. In order to remove the featured images from the single image pages, I had to do some exploring to discover how he had set it up. This exploration resulted in the following function:
1 2 3 4 5 6 7 | // removes the post thumbnail from Swagger. This is unique to the swagger theme function uig_remove_post_thumbnail_on_single_images_swagger($output, $location, $size, $link) { if(is_singular('uig_image')) return ''; return $output; } add_filter('themeblvd_post_thumbnail', 'uig_remove_post_thumbnail_on_single_images_swagger', 4, 998); |
It is essentially the exact same thing, but using the custom filter Jason setup instead of the one provided by WordPress core. This is NOT how I advise doing things in your own custom development. I posted a friendly rant about this topic this morning. Check out Episode 3 of Plugin Thoughts: Don’t Forget About Core Functions.
Alright, now that we have the double image issue worked out (for some themes only), it is time to write the function that displays the additional images by the user.
Back in the template-functions.php file, add the following function:
1 2 3 4 5 6 7 8 9 10 11 12 13 14 15 16 17 18 19 20 21 22 23 24 25 26 27 28 29 | // retrieves other images by the same author function get_other_images_by_author($author_id, $exclude_id, $number = 4) { $output = ''; $images = get_posts(array( 'post_type' => 'uig_image', 'numberposts' => $number, 'exclude' => $exclude_id, 'author' => $author_id, 'orderby' => 'rand' ) ); if($images) : $output .= '<div id="users-other-images" class="uig-clearfix">'; $output .= '<p class="other-images-by-user-heading">' . __('Other images by this user:', 'uig') . '</p>'; $output .= '<ul class="other-images-by-user-list">'; foreach($images as $image) { $output .= '<li><a href="' . get_permalink($image->ID) . '">' . get_the_post_thumbnail($image->ID, 'uig-gallery-image') . '</a></li>'; } $output .= '</ul>'; $output .= '</div>'; endif; return $output; } |
This function does little more than use get_posts() to retrieve a specified number of images from the same author as the image we’re currently viewing. It then outputs the images in a simple unordered list.
Nothing complex here.
The very last thing we need to do to finish out this part in the series, is add a little custom CSS to style the “Other images by this user” section.
Add the following lines to gallery.css:
1 2 | ul.other-images-by-user-list { margin: 0; padding: 0; } ul.other-images-by-user-list li { display: block; float: left; margin: 0 10px 10px 0; padding: 0; } |
you can, of course, add more styling, but this will take care of the basics.
In the Next Part . . .
In part 7, we will cover adding additional columns to the dashboard Images page, and also adding a new widget to the main Dashboard page that will show a list of pending images submitted by users.


