This entry is part 4 of 9 in the Integrating Stripe.com with WordPress Series
- Stripe Integration Part 1 – Building the Settings and a Simple Payment Form
- Stripe Integration Part 2 – Recurring Payments
- Stripe Integration Part 3 – Variable Prices and Enhanced Plan Handling
- Stripe Integration Part 4 – Multiple Recurring Payment Options
- Stripe Integration Part 5 – Accepting Discount Codes
- Stripe Integration Part 6 – Payment Receipts
- Stripe Integration Part 7 – Creating and Storing Customers
- Stripe Integration Part 8 – Working with Invoices
- Stripe Integration Part 9 – The Stripe Button
In the previous part of this series, we added the ability to do recurring payments and also the option to define the plan ID you wanted users to sign up for. Now it is time to take this a bit further and give the user the ability to select the plan they wish to signup for when they are submitting their payment. This provides greater flexibility, more real-world applications, and illustrates an important part of working with the Stripe API.
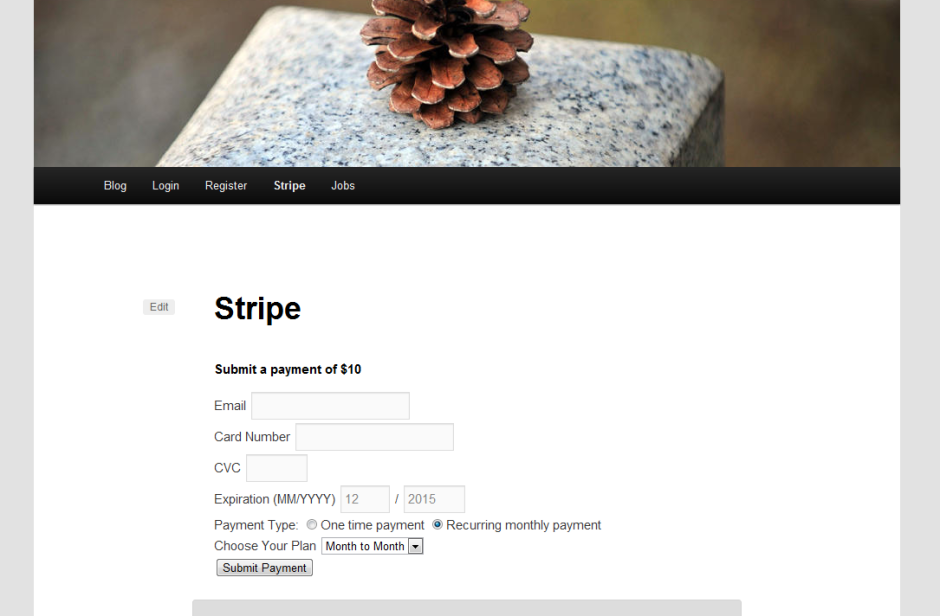
Once complete, our payment form will look like this:
There are two main things we are going to do here:
- Add a drop down to our payment form that dynamically pulls in payment plans from Stripe
- Add an email field to the form so we know who the payment is coming from
Let us start by adding the drop down for the plan selection. We are going to write a function called pippin_get_stripe_plans(); it will be used for retrieving all of the plans from our Stripe account and then formatting them into a simple array. This function is going to be added to a newly created file called stripe-functions.php, which is placed inside of the includes folder.
1 2 3 4 5 6 7 8 9 10 11 12 13 14 15 16 17 18 19 20 21 22 23 24 25 26 27 28 | <?php function pippin_get_stripe_plans() { global $stripe_options; // load the stripe libraries require_once(STRIPE_BASE_DIR . '/lib/Stripe.php'); // check if we are using test mode if(isset($stripe_options['test_mode']) && $stripe_options['test_mode']) { $secret_key = $stripe_options['test_secret_key']; } else { $secret_key = $stripe_options['live_secret_key']; } Stripe::setApiKey($secret_key); // retrieve all plans from stripe $plans_data = Stripe_Plan::all(); // setup a blank array $plans = array(); if($plans_data) { foreach($plans_data['data'] as $plan) { // store the plan ID as the array key and the plan name as the value $plans[$plan['id']] = $plan['name']; } } return $plans; } |
We will now be able to do this:
$plans = pippin_get_stripe_plans(); |
The resulting $plans array will be structured like this:
Array
(
    [monthtomonth] => Month to Month
    [monthly_3_sites] => Monthly 3 Sites
    [monthly_2_sites] => Monthly 2 Sites
    [standard_monthly_plan] => $49/month
    [medium] => Medium
    [basiclevel] => Basic Level
    [advanced] => Advanced
    [codelover] => Code Lover
    [hobbycoder] => Hobby Coder
    [basic] => Basic
)
In our short code function that outputs our payment form, we can add the following:
1 2 3 4 5 6 7 8 9 10 11 12 13 | <div class="form-row" id="stripe-plans" style="display:none;"> <label><?php _e('Choose Your Plan', 'pippin_stripe'); ?></label> <select name="plan_id" id="stripe_plan_id"> <?php $plans = pippin_get_stripe_plans(); if($plans) { foreach($plans as $id => $plan) { echo '<option value="' . $id . '">' . $plan . '</option>'; } } ?> </select> </div> |
This should go just after the payment type radio buttons. Note that I have set the div.form-row to display:none;; this is because we only want to show the plan selection when the “recurring” option is selected for the payment type. We will add the jQuery for this next.
Open stripe-processing.js, located in includes/js. We are now going to add a simple jQuery function to show / hide our plan selection field.
1 2 3 4 5 6 7 | $('.stripe-recurring').change(function() {
if($(this).val() == 'yes') {
$('#stripe-plans').slideDown();
} else {
$('#stripe-plans').slideUp();
}
}); |
This detects the value of the selected radio button whenever one is clicked, and then displays or hides the plan selection field accordingly. Make sure you place this inside of the jQuery(document).ready(function($) { . . .}); function.
Let’s now add one more thing to the short code: the email field. We need to have an email field in our payment form so that we have a way to know who our payment is coming from. This is very simple and looks like this:
1 2 3 4 | <div class="form-row"> <label><?php _e('Email', 'pippin_stripe'); ?></label> <input type="text" size="20" class="email" name="email"/> </div> |
I placed it at the top of the form, but the position it up to you.
There are just two more things to do:
- alter our payment processing function to reflect the plan selection (before it used a plan ID stored in settings)
- remove the old option where we used to store in the plan ID
Open includes/process-payment.php. Around line 27, just after the conditional check that detects $_POST[‘recurring’] == ‘yes’, place this:
1 | $plan_id = strip_tags(trim($_POST['plan_id'])); |
And now we need to adjust the Stripe_Customer::create function to include our new plan ID. We do that like this:
1 2 3 4 5 6 | $customer = Stripe_Customer::create(array( 'card' => $token, 'plan' => $plan_id, 'email' => strip_tags(trim($_POST['email'])) ) ); |
Note that I have also add the “email” parameter. This will record the email the user enters in the form.
All together, we have this:
1 2 3 4 5 6 7 8 9 10 11 12 13 14 15 16 17 18 19 20 21 22 23 24 25 26 27 28 29 30 31 32 33 34 35 36 37 38 39 40 41 42 43 44 45 46 47 48 49 50 51 52 53 54 55 56 57 58 59 60 61 62 63 64 65 66 67 68 69 70 | <?php function pippin_stripe_process_payment() { if(isset($_POST['action']) && $_POST['action'] == 'stripe' && wp_verify_nonce($_POST['stripe_nonce'], 'stripe-nonce')) { global $stripe_options; // load the stripe libraries require_once(STRIPE_BASE_DIR . '/lib/Stripe.php'); $amount = base64_decode($_POST['amount']) * 100; // retrieve the token generated by stripe.js $token = $_POST['stripeToken']; // check if we are using test mode if(isset($stripe_options['test_mode']) && $stripe_options['test_mode']) { $secret_key = $stripe_options['test_secret_key']; } else { $secret_key = $stripe_options['live_secret_key']; } Stripe::setApiKey($secret_key); if(isset($_POST['recurring']) && $_POST['recurring'] == 'yes') { // process a recurring payment $plan_id = strip_tags(trim($_POST['plan_id'])); // recurring payment setup will go here try { $customer = Stripe_Customer::create(array( 'card' => $token, 'plan' => $plan_id, 'email' => strip_tags(trim($_POST['email'])) ) ); // redirect on successful recurring payment setup $redirect = add_query_arg('payment', 'paid', $_POST['redirect']); } catch (Exception $e) { // redirect on failure $redirect = add_query_arg('payment', 'failed', $_POST['redirect']); } } else { // process a one-tiome payment // attempt to charge the customer's card try { $charge = Stripe_Charge::create(array( 'amount' => $amount, // amount in cents 'currency' => 'usd', 'card' => $token ) ); // redirect on successful payment $redirect = add_query_arg('payment', 'paid', $_POST['redirect']); } catch (Exception $e) { // redirect on failed payment $redirect = add_query_arg('payment', 'failed', $_POST['redirect']); } } // redirect back to our previous page with the added query variable wp_redirect($redirect); exit; } } add_action('init', 'pippin_stripe_process_payment'); |
That’s it, our payment form is fully functional. We still need to remove the plan ID option in the settings page, so open includes/settings.php and remove this section:
1 2 3 4 5 6 7 8 9 | <tr valign="top"> <th scope="row" valign="top"> <?php _e('Plan ID', 'pippin_stripe'); ?> </th> <td> <input id="stripe_settings[plan_id]" name="stripe_settings[plan_id]" class="regular-text" type="text" value="<?php echo $stripe_options['plan_id']; ?>"/> <label class="description" for="stripe_settings[plan_id]"><?php _e('Enter the ID of the recurring plan you have created in Stripe', 'pippin_stripe'); ?></label> </td> </tr> |
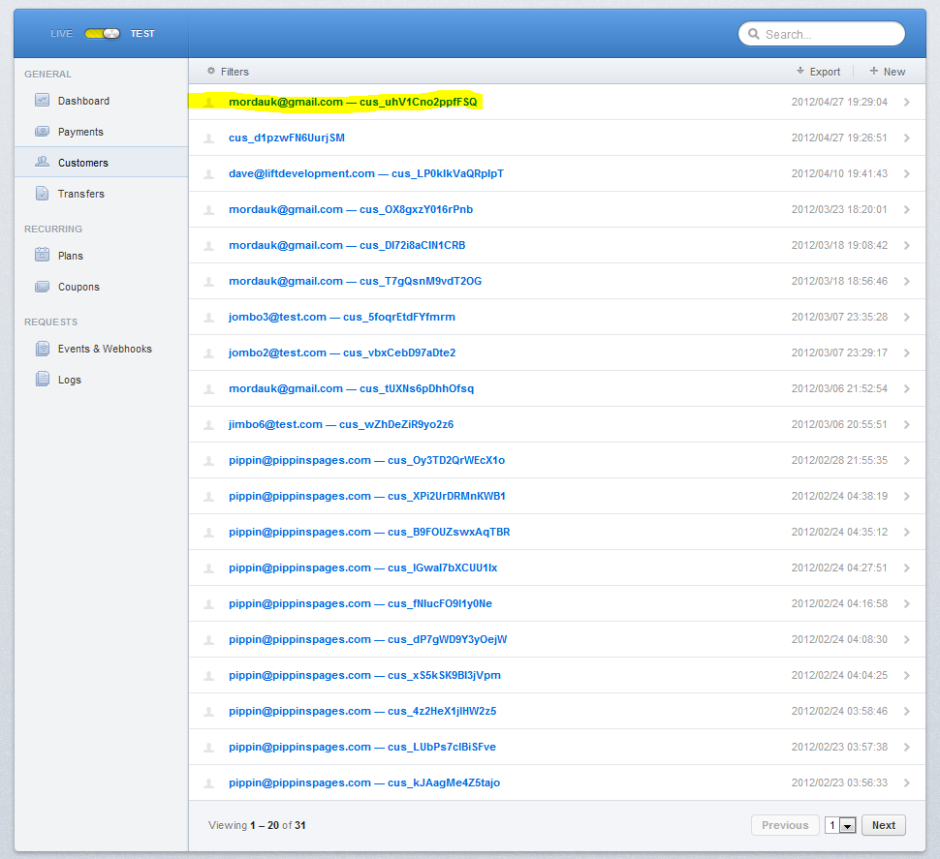
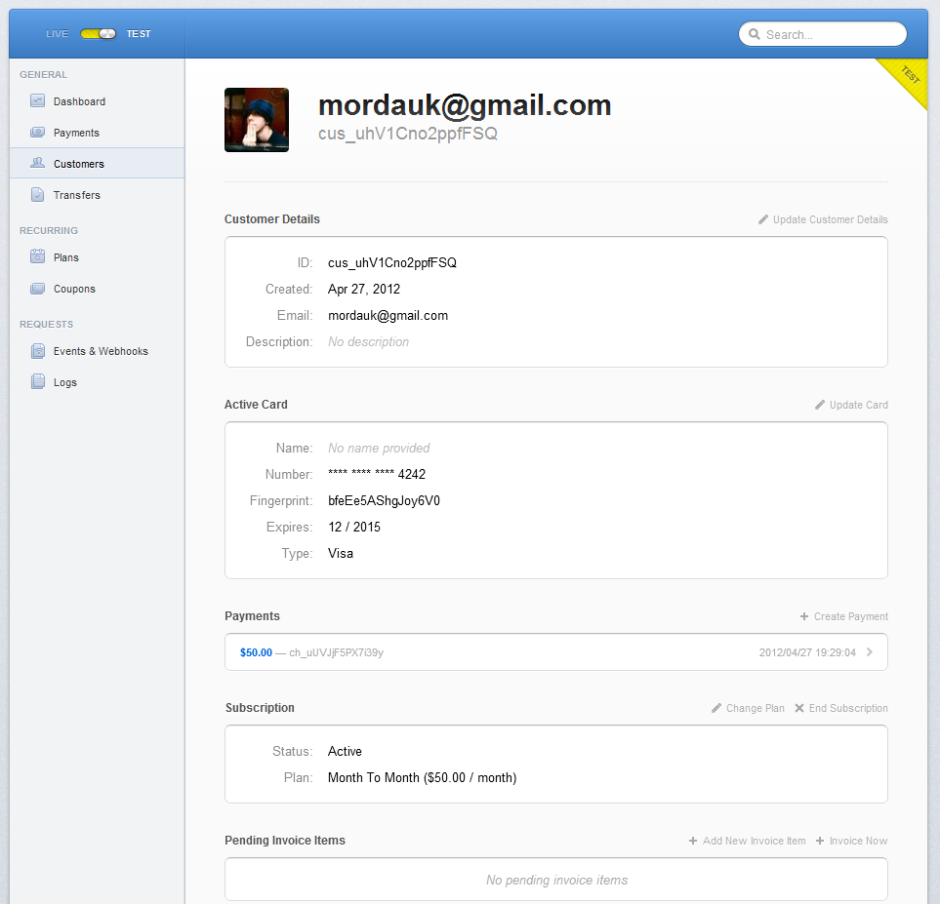
We can now submit a payment (I suggest trying it in Test mode) and it will appear in Stripe like this:
The complete source code for this part of the series can be downloaded below.
[download id=”42″ format=”1″]


Love the plugin, but wanted to make it more secure by adding in first/last name, and address information. Could you please show anyone viewing this how to do it?
Joseph, it’s really quite simple. You just pass a couple of extra keys to the Stripe Charge/Customer array. Please take a look at the two documentation sections: Stripe Customer (for recurring) and Stripe Charge (for one time payments).
Is it possible to set limit to the number of payments a customer will be charged. For example if they want to sign up for a 3 month, 6 month or 10 month membership? Also, thanks a lot for putting all of the time an effort into this tutorial – it is really informative and helpful!
I believe you can with the Invoice Object, though I haven’t played with it enough to be sure.
Great tutorial, though does the slideDown() function actually work? I wasn’t able to get it to work. I also downloaded the plugin and couldn’t get the slideDown() function to work either.
Regards,
Denis
Sounds like you might have a jQuery conflict. If you look at the “Inspector” in Chrome, do you see a red error icon in the bottom right?
Pippin,
Thanks for that, I’m a jQuery noob. I had to set jquery as a dependent for the strip enqueue script functions for it to work properly. I also had to write the change() function like this:
$(“#stripe-plans”).css(“display”,”none”);
$(‘[name=”recurring”]’).change(function() {
if($(this).val() == ‘no’) {
$(‘#stripe-plans’).slideUp();
} else {
$(‘#stripe-plans’).slideDown();
}
});
d.
Is that working for you?
Is it possible to limit the number of recurring payments with stripe? For example if you have 3, 6 and 10 month memberships? If so, how would you go about doing it? THanks
Just add… class=”stripe-recurring” after the name=”recurring” to the radio input field and the “sliding effect” will work.
Hey!
This plugin is perfect for what I’m trying to do!
I can’t figure the following things out though:
1) how do I set up the monthly donations plan? Right now, I call the plugin with:
[payment_form]
What am I missing?
2) The submit button is not appearing.
I added [stripe_button amount=”20″ desc=”Donate Now”] after the [payment_form], but it’s still not showing up.
Thank you very much for your help,
D
1). Have you followed each part of this tutorial series?
2). I’d need to see a live page with the short code on it to help debug.
Please note, this plugin is meant primarily for demonstrative purposes and is not necessarily production ready.
Hey.. i want to add some new fields
like name and address..please help me..
I”m sorry but that goes beyond the scope of this tutorial.
For the drop down menu options, I’ve been trying to add the price after the name of the plan. Unfortunately I’m new to a lot of php and can’t figure out how to accurately fetch/display it.
How can we integrate fund transfer to 3rd party.
My email is not being sent and is not displayed in the stripe payment list. also, can i send email of user in one time donation as well?
Ok, i see my email is being sent for recurring payment, so the issue remains is can i send email of user in one time donation?
Stripe supports that out of the box. You just need to enable email receipts from your account settings.
Hi Pippin
thanks a lot, i just wanted to know can we set the duration of a subscription using stripe, eg, i have three subscription plans i.e.
2 Years ($30)
3 Years($45)
and
5 Years ($60)
is it possible using stripe?
Also as per your last reply “Stripe supports that out of the box. You just need to enable email receipts from your account settings.”
i have made the setting in stripe account but what changes do i need to make in code for sending email for one time payment.
Yes it is!
but how, i searched a lot but didn’t find any option.
I’m happy to help answer questions for you, but I’ll need to see what you have tried first. This tutorial series is meant as an educational piece that helps developers learn how to build custom plugins and applications with the Stripe APi.
If you’re looking for a ready-to-use Stripe plugin, you will want to consider something like Easy Digital Downloads and Recurring Payments or Restrict Content Pro:
https://easydigitaldownloads.com/downloads/recurring-payments
https://restrictcontentpro.com
thankyou so much for your support this far and i am not looking for a ready-to-use Stripe plugin, all my code is ready but the thing is in my site,
user can either pay one time or on monthly basis
but plans for monthly basis have duration e.g. :
2 Years ($30)
3 Years($45)
and
5 Years ($60)
but in my stripe account there is no option to specify time duration, they just ask for interval of payment, that why i wanted to know that how can i set that duration, like 1 year, two years for my subscription plans.
Thanks
i have 3 plan.
is it possible to make payment in single token or any code how to make payment.
like
3 plan
1)test1
2)test2
3)test3
now when i make payment only first plan payment success others not done
any help?
i have one question about strip subscription, i was created two plans in stripe 1. plan A and 2. plan B, when i subscribe plan 1 from my website it good in stripe like created customer and i can see subscription also, but when i subscribe plan B i can in stripe there is i can see two customers with same email id’s, so this is legal way to subscribe user?, if i want only one email id but plans will different am i right?